Loose Wave Hair Tutorial
Published 7/17/2018 • Updated 5/28/2019
This post may contain affiliate links. Please read our disclosure policy.
It’s time to step up your hair game. Check out my loose wave hair tutorial to find out how I put perfect, beachy, loose waves into my hair every time! All you need is a 1 – 1.25-inch curling iron, hairspray, and some dry shampoo!

Can I just tell you how much I love producing content that isn’t food?! Recipes and food are my first born child, but I love the variety of things we’ve been posting lately. From home decor to outfits, to hair tutorials, I love it all. Today I’m sharing a tutorial on how I curl my hair AKA on how to get those long-lasting beachy waves that look effortless yet put together at the same time. I wouldn’t call my self a hair expert, but I do know how to curl hair as I’ve been doing it since high school (that’s 10+ years).
I always tell people that my next job is going to be at a hair salon. This might sound weird, but I love the idea of doing hair for a living. It’s creative and personable, and you get to be on your feet all day. Growing up I was convinced I’d be a hairstylist, but my career path changed to food stylist? At least I’m a stylist of sorts! Anyways, I’ve been doing my hair pretty much the same way since high school and turns out it hasn’t gone out of style. So, I finally took the time to film a video on how I get these loose waves that last for days.
Here’s what you need to get My Look
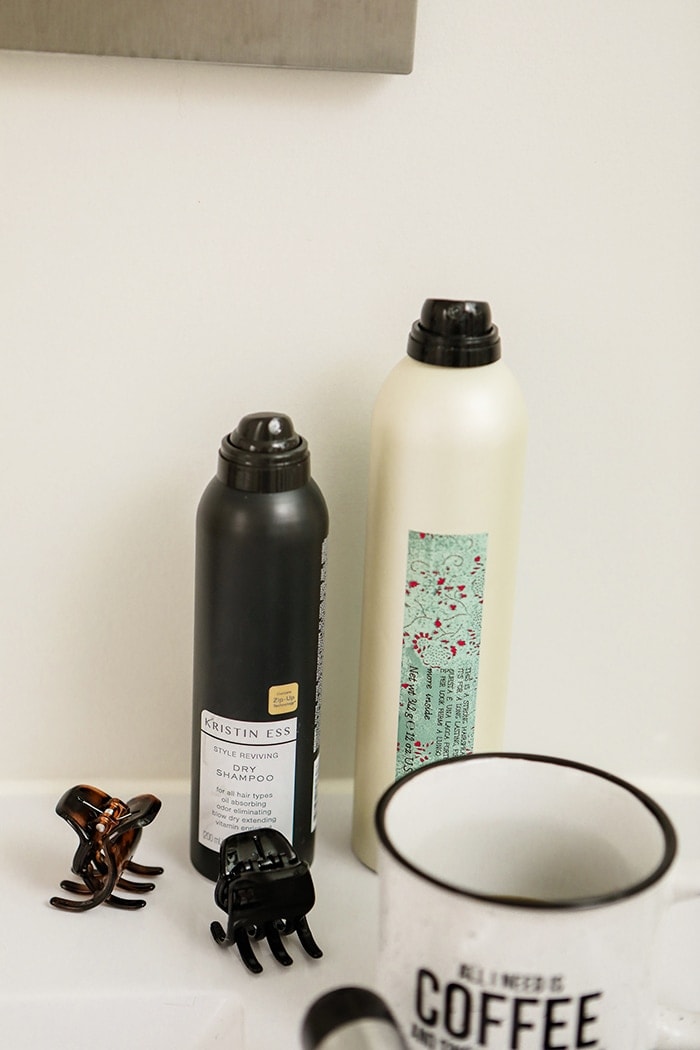
You only need a few things to get started with this loose wave hairstyle. Check out all of the products I use below:
- Curling Iron (1-inch or 1.25-inch)*
- Hair Spray ( I love Davines This is Strong Hairspray)
- Dry Shampoo (Kristen Ess Dry Shampoo is the best!)
*I mentioned in my video that I used a 1-inch curling iron, but I actually used a 1.25 inch. When my hair is shorter, I use a 1-inch, but when it’s past shoulder length like it is now, I use a 1.25-inch curling iron. You don’t need a hundred dollar curling iron, and I actually just ordered this $30 Hot Tools 1.25-inch off of Amazon last week!
Loose Wave Hair Tutorial
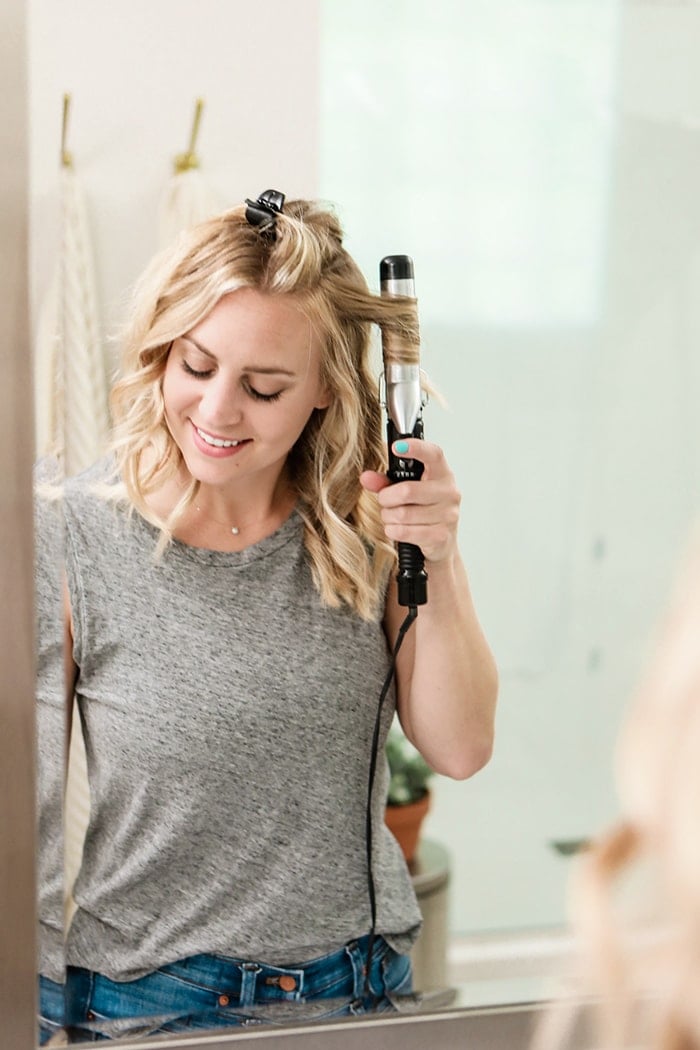
Before you begin curling your hair. Did you watch my video above? I always find that watching video helps me learn how to do my hair faster and more efficiently!
- Step 1: Make sure your hair has been thoroughly dried. I have ringlet curly hair, so I find this style holds best if I wash my hair, dry my hair, and immediately start curling. I’ve tried to do this hairstyle on already straightened hair (with a straightener) or on day 2 of natural hair, but it doesn’t hold as well as putting a little hair dryer heat to my hair and then immediately curling.
- Step 2: Section off hair. I like to part my hair down the middle to section it off into 2 sides. From there, I start at the bottom and work my way to the crown of my head.
- Step 3: Start curling! Grab a small section of your hair and open your curling iron, clamping the hair at the bottom of the strand leaving about an inch out. Sometimes I like to start at the crown and smooth my hair out with the curling iron (kind of like straightening it….curly haired girls, you know what I’m talking about) before clamping and curling. By leaving 1-inch out, you’ll get the effortless curl look instead of it being so full at the bottom. This is KEY.
- Step 4: Curl AWAY from your face. All of the hair on your right side will curl away from your face in the same direction and same for the left! Hold for a few seconds and then release. REPEAT.
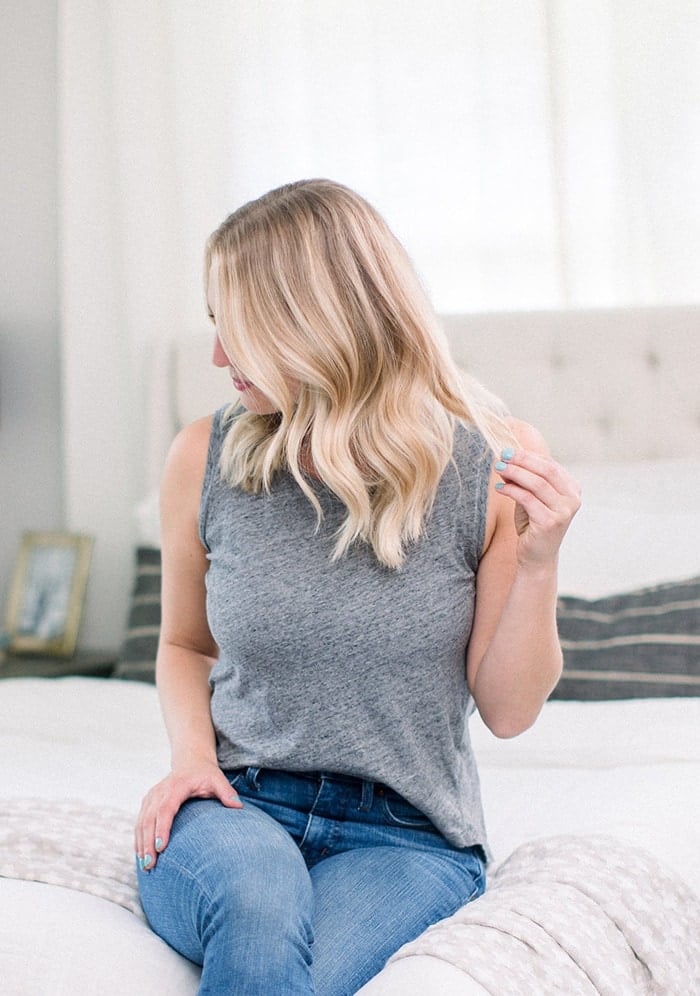
- Step 5: Once you’ve done all the hair on one side, give your curls a generous spray with hairspray. Then, let it sit and continue on with the next side.
- Step 6: Repeat steps 3 – 5 for the second side.
- Step 7: Now that all of your hair has curled wait about 30 seconds after spraying the second side and then lightly comb or brush through it. This will loosen up your curls a bit.
- Step 8: Give your hair one final spray of hairspray and then spray your roots with a little bit of dry shampoo (this dry shampoo is THE SHIT) to give it some body.
Once you’ve got your hair curled, you should be good to go for a few days. I’m blessed that my hair holds whatever I do to it! I can workout with this hairstyle (I put it in a bun) and take it down and it’ll still be looking good with a few touch-ups. I often brush through these curls throughout the day if they get a little snarly.
I hope you loved this tutorial as much as I did! Check out my other hair tutorials below!


I never knew dry shampoo gave the hair body. This would be perfect for virgin hair extensions which need a little more fluff. That was an eye opener. Thanks for that tip and keep up the good work!
Yes! It gives such great texture.
Who colors your hair in Minneapolis? SO pretty!
Check out Kara at Denny Kemp Edina!
Love your tank! Where’s it from?