Peanut Butter Crunch S’mores Cookies
Published 5/12/2025
This post may contain affiliate links. Please read our disclosure policy.
These crunchy peanut butter s’mores cookies are a sweet, salty, and gooey twist on a campfire classic. I absolutely LOVE a good s’more, and you bet if we’re having a campfire in the backyard that there will be s’mores roasting going on. So, when I set out to create these cookies, I knew I needed to include chocolate and mini mallows. Now you can enjoy s’mores year-round, too 🥰
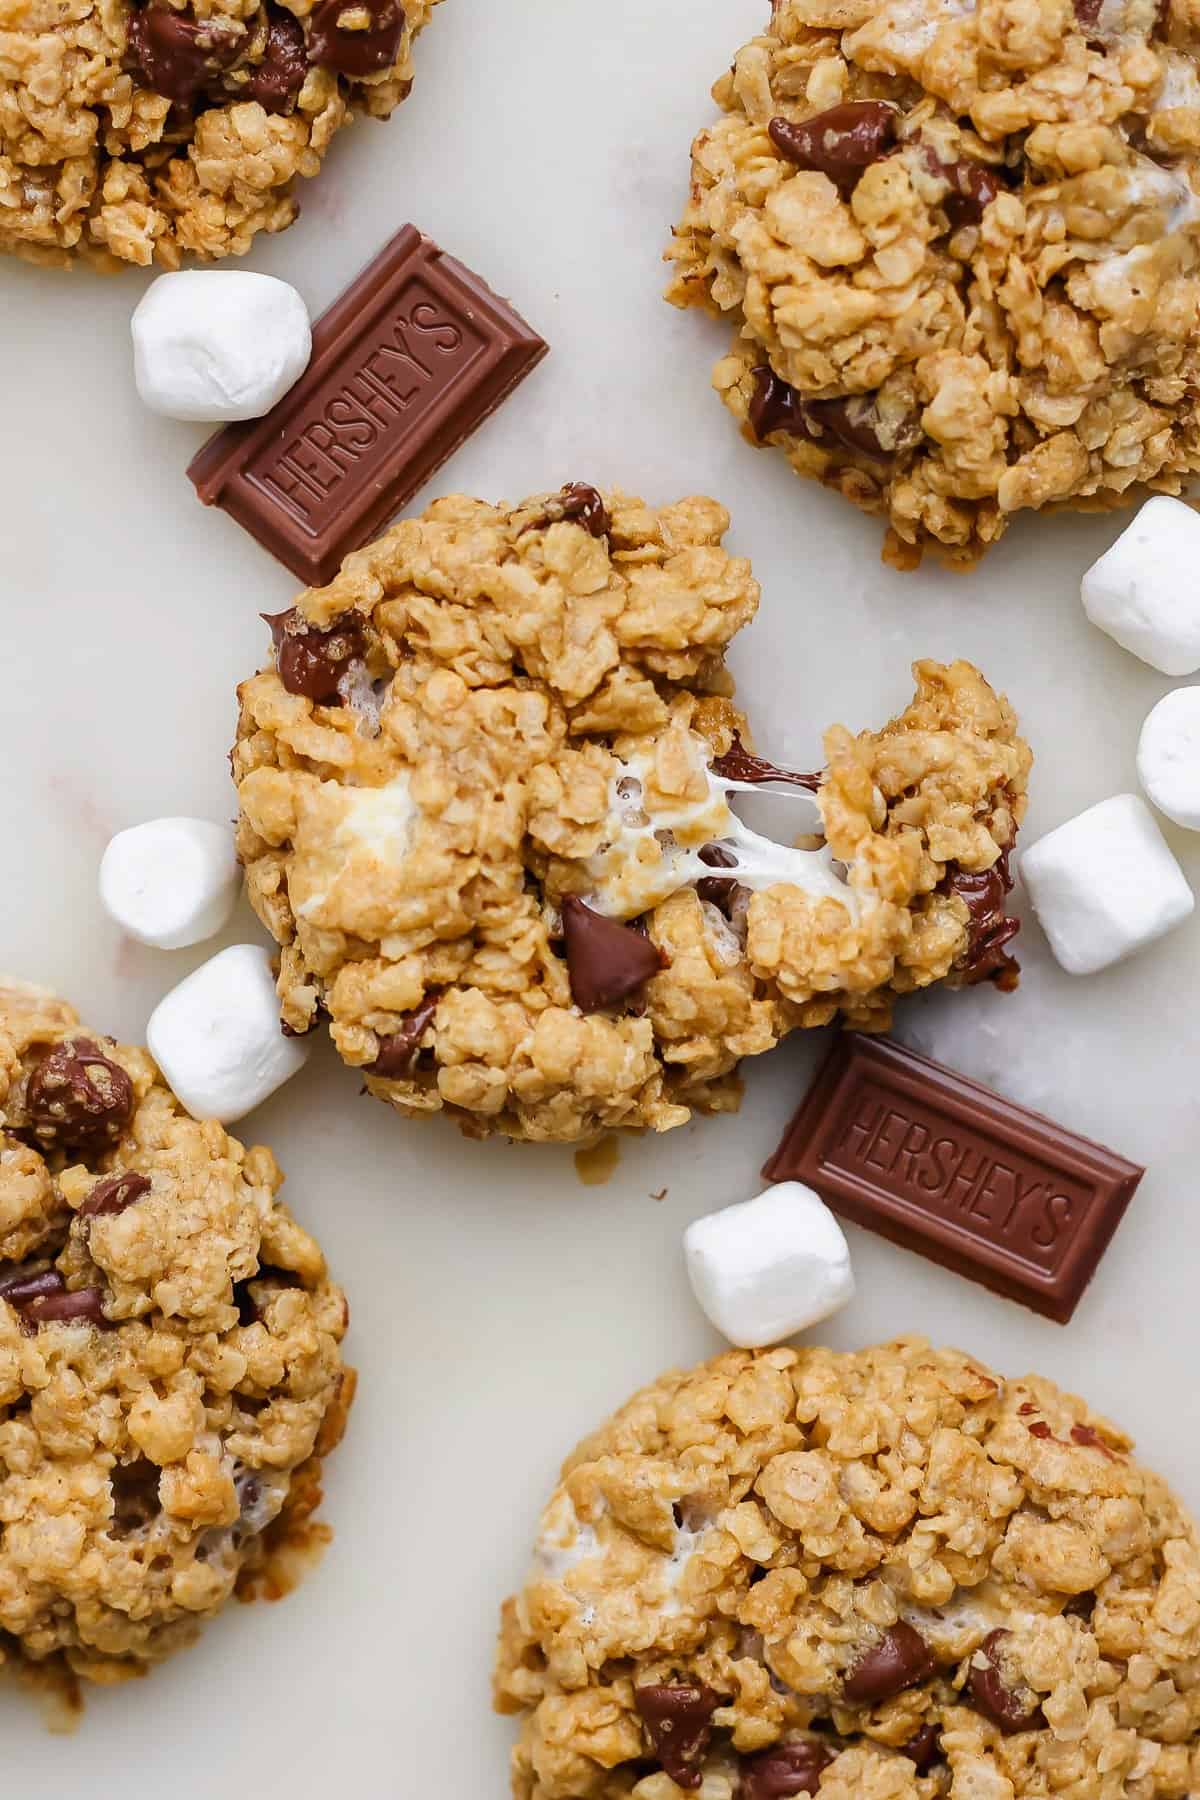
These s’mores cookies are made perfectly crunchy thanks to rice krispies, gooey from the mini marshmallows, and decadently chocolate-y from semi-sweet chocolate chips.
recipe highlights ⤵️
- These cookies are chewy AND crispy 😋
- They can easily be made gluten-free by using certified GF quick-cooking oats.
- Freezes well, so you can store them for later.
- Toddler approved 🙌🏻 🙌🏻
Essential Ingredients
- Quick-cooking oats: feel free to use certified GF oats to make these cookies completely GF! Otherwise, any quick-cooking oats brand will work.
- Drippy peanut butter: make sure you’re using drippy all-natural peanut butter for these cookies! I recommend Smuckers or Good and Gather.
- Rice Krispies: folding rice krispies into the dough gives these cookies a nice CRUNCH.
- Chocolate chips: I prefer semi-sweet chocolate chips, but milk chocolate will also work just fine. You can also chop up Hershey’s chocolate squares for a super classic s’mores look.
- Mini marshmallows: mini mallows are the perfect bite-size for these cookies. They become ooey gooey when you bake ’em 😋
My Pro Cookie Baking Tips 🍪
This cookie dough is pretty sticky, so I find that it helps to moisten your hands before rolling the cookie dough into balls. If your hands are still too sticky, you can rinse them in between rolling the dough balls.
These cookies will spread just a little bit when baking, so if you don’t press them down slightly before baking, you will end up with dome-shaped cookies.
To make these cookies all perfectly round, use a large cup and place the cup upside down over the cookie after baking (when the cookies are still warm). Move the cookie around in a circular motion to form the perfect circle.
Let Cool, Then Enjoy and Save the Rest
Keep these cookies in an airtight container at room temperature for up to 5 days, making sure they fully cool before storing.
Can you Freeze Cookies?
Absolutely! These cookies will keep in the freezer for up to 3 months if stored in an airtight container.
Simply allow the cookies to cool completely, and then store in an airtight container (large Ziplocs work great for this!), and write the date you made the cookies + the name of the cookies on the bag before placing in the freezer.
To thaw
Thaw these cookies at room temperature overnight, or if you’re in a pinch for a cookie right now, remove from the freezer and place a cookie in the microwave for 1 minute on defrost, or until it’s chewy and delicious.
Time for the Next Batch
- Chocolate Peanut Butter Protein Cookies
- Favorite Peanut Butter Cookies
- Healthy Monster Cookies
- Oatmeal Raisin Cookies
- White Chocolate Cranberry Oatmeal Cookies
- Peanut Butter Protein Cookies
- ALL Cookies
Peanut Butter Crunch S’mores Cookies Recipe

Ingredients
- 1/2 cup melted unsalted butter
- 1 cup packed light brown sugar
- ¼ cup maple syrup
- 2 large eggs
- 1 cup drippy, all-natural peanut butter
- 2 teaspoons vanilla extract
- pinch salt
- 4 cups quick-cooking oats, gluten-free if desired
- 1 teaspoon baking soda
- 1 cup semi-sweet chocolate chips
- 2 cups rice krispies
- 1 cup mini marshmallows
Instructions
- First, preheat the oven to 350ºF and spray a baking sheet with nonstick cooking spray.
- Next, combine melted butter and brown sugar until there are no lumps. Then, add maple syrup, egg, peanut butter, and vanilla and mix again.
- Add salt, quick-cooking oats, and baking soda and mix until everything is combined. Add in chocolate chips, rice krispies, and marshmallows. Mix one more time.
- Refrigerate dough for 20 minutes to set.
- Scoop 2 tablespoons of batter into your hands and form it into a ball. Place it onto the cookie sheet and slightly press down to form a cookie shape. The batter will feel a bit wet, but they will be so soft and chewy when done baking!*
- Repeat the process above until you’ve fit 6 cookies on your baking sheet.
- Bake cookies at 350ºF for 11-14 minutes or until they begin to turn golden brown.
- Remove cookies and let cool for a couple of minutes on the baking sheet before transferring to a wire rack to continue cooling for at least 20 minutes to firm up. To make them all perfectly round, use a large cup. Place the cup over the cookie and move the cookie around in a circular motion to form the perfect circle.
Tips & Notes
- Cookie dough – the cookies will spread just a little bit when baking. If you don’t press them down, you will get dome-shaped cookies.
- It might help to slightly moisten your hands before rolling the cookie dough and washing your hands in-between balls because the dough is pretty sticky.
Nutrition
Nutrition information is automatically calculated, so should only be used as an approximation.
Don’t forget to tag your posts on social media with the hashtag #fitfoodiefinds, we’d love to see what you’re up to!
Photography: photos taken in this post are by Erin from The Wooden Skillet.